Jump to Section:Best Price
Comments
Our Verdict
An uplifting desk
NEED to know
Lift me up [+] Strong; easy to assemble; many size/color/height options; three easily programmable height presets.
Pull me down [-] Hard to disassemble; no drawers; not many cable management options.
An uplifting desk
If you’ve got a desk job, then you’re probably already aware of its most lethal hazard; I am, of course, referring to the dangers of sitting. The director of the Mayo Clinic-Arizona State University’s Obesity Solutions Initiative recently said, “Sitting is more dangerous than smoking, kills more people than HIV and is more treacherous than parachuting. We are sitting ourselves to death.” With quotes like that, you may want to stand up for this. Luckily, if work has you at your desk all day, you can take comfort in knowing that there are a plethora of standing desks out there, which aim to alleviate the issue. I recently received UpDesk’s PowerUp Series III. I had heard good things about it, but let’s put it to the test and find out for sure!

The PowerUp comes in three different sizes and price points: 48 inches ($890), 60 inches ($980), and 72 inches ($1,040). I received the medium-sized 60-inch variety. Our medium-sized model is wide enough to snugly fit two 27-inch monitors in addition to our big desktop chassis. Of course, in front of that there is also plenty of room for our computer peripherals as well. The PowerUp also comes in a wide variety of colors that include white, maple, mahogany, orange, and black. I received the latter color. The first thing you'll notice about the desk is its minimalist design. There is a 4.5-inch deep curved cut-out for you to sit in closer to the desk (and to make room for big bellies), and there is a smaller one inch thick curve in the back where you can drop your cables. The surface of the PowerUp uses a 1.25-inch thick high-pressure laminate desktop. It’s smooth enough to use your mouse on, but I opted for a mousepad myself.

While there is a manual crank version of the PowerUp (appropriately named the “ CrankUp," our desk has electric motors for each of its two legs. These motors are connected to a little front-facing panel that has buttons that allow you to move the desk up and down. You can also use this panel to easily create three different height presets. I used the three different presets for sitting, standing, and eating, but you could have multiple standing heights in case a variety of people of varying heights interchangeably use the desk. There is an noticeable noise to the motors as they lift and lower your desk, but it’s hardly offensive and actually kind of contributes to the “wow" factor, in case you’re showing it off to new people.

After trying out a bunch of configurations I ended up switching off between sitting and standing about half the time. While you can game on your feet, it took me a little out of my comfort zone, especially when playing competitive first-person shooters where I like to sit comfortably. Playing rounds of CS:GO felt much more tense standing up, as I was a little out of my element (plus, I’m not very good at the game to begin with), but how you want to play is up to you. Luckily, the desk does work well as both a standing desk and traditional plank. When converting to standing after a few hours of sitting, it feels surprisingly refreshing to be thrown into a new stance, and oddly helps get the creative juices flowing again.

One small gripe that I had about the elevation change is that the desk requires you to hold down the up/down/preset buttons all the way through to complete the action. Perhaps part of this is a safety concern, however, as you wouldn’t want to crush your desk chair underneath the table. The table can go as low as 24.5 inches and up to 50.5 inches. That’s short enough for little kids and tall enough for most basketball players. We timed it at about 18 seconds for the desk to go from its lowest point to its highest; it moves at a super smooth pace during the transition. And because the PowerUp doesn’t have a middle leg, there’s plenty of legroom here or space for an office treadmill, if you’re into that sort of thing. The two legs that the PowerUp does have use reinforced steel footings, and are super strong. As a matter of fact, the desk can withstand up to 375 pounds! Suffice it to say, it feels super sturdy.

As I touched upon earlier, the PowerUp uses a simple design. There’s little in the way of frills here. This means you don’t get a fancy glass top, keyboard tray, or even any drawers. Our table didn’t come with wheels, but the company does sell them in a separate set for 67 bucks, which is kind of a pretty penny for what amounts to four wheels.
Luckily, installing the PowerUp is relatively quick and painless. UpDesk says that you should be able to get everything put together in about 20 minutes, and I’d say it took me under half an hour to have everything up and lifting. Unlike Ikea furniture, The instructions are simple and easy to understand. Basically, you’ll want to lay the top side of the table down onto the ground. From here, you place both L-shaped legs in their respective slots within the belly side of the table. The PowerUp includes two little hard drive-like cage brackets that you use to snap on and secure the legs onto the desk. From here, there is a little locking mechanism that you insert into the brackets, (and here is where it gets a little weird), you then step onto the locking mechanism to lock the legs in place. After that, you use two included screws to mount the front panel controller onto the desk. Finally, you plug in your standard three-prong power cable into the table’s PSU along with the legs’ pair of Ethernet cables and 6-pin power cables to get everything powered up and in sync. And that’s pretty much it.
Once you’ve got the table set up, you’ll notice that it has a small channel underneath the table for its own cable management, but there isn’t much in the way of fancy cable management accessories or cut-outs for the rest of the gear that will actually be on your UpDesk.

While there is a lot to like about the UpDesk, it isn’t perfect. As mentioned, it would be nice to have more robust cable management options, and I would have appreciated it if I could simply tap the buttons for the desk transitions to happen automatically. Also, I would appreciate having some built-in drawers on the desk, considering the motors are strong enough to carry the extra load. Our black desk is also somewhat of a fingerprint magnet. It’s not a big problem, but it is noticeable. And considering this configuration is worth a grand, it would have been nice if UpDesk went the extra mile to include a bottom-mounted power strip for cleaner cable management. Perhaps the desk’s biggest weakness, however, is that it is hard to take apart. Removing the hard drive cage-like brackets portion that secures the legs in place is no easy task, which makes it a pain when you have to move.
Still, the PowerUp desk is a quality hunk of table. It’s super solid, comes with a five-year warranty, and is also made in the good old US of A. While you’ll might be paying more than what you typically would for a desk, the health benefits that it can provide will pay you back in the long run.
Image 1 of 17
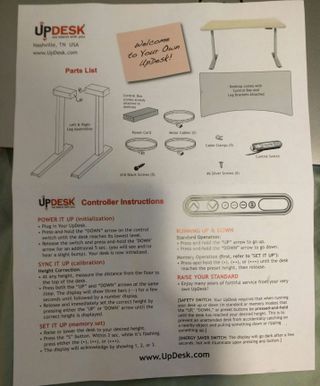
Here's the first page of the desk's instructions.
Image 2 of 17
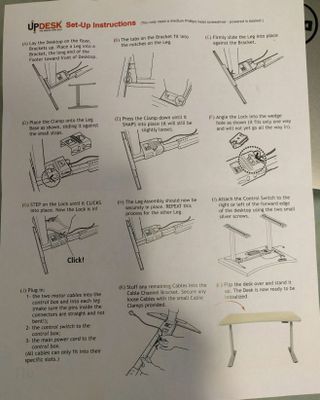
Here is the second page of the desk's instructions.
Image 3 of 17
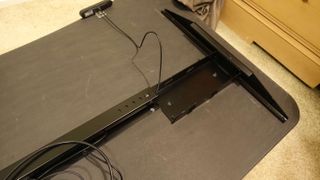
You start off by flipping the table upside down.
Image 4 of 17
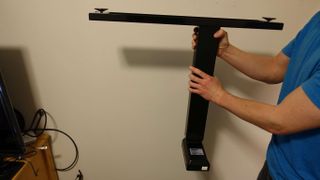
You then go on and grab a leg.
Image 5 of 17
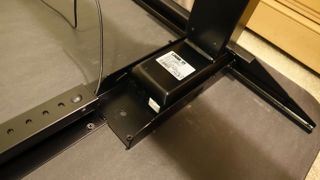
Insert each leg into its respective bracket.
Image 6 of 17
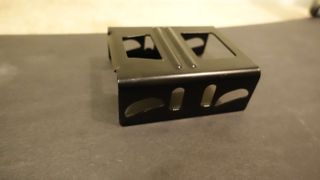
Then you'll need to grab the clamp, which looks a lot like a hard drive tray.
Image 7 of 17
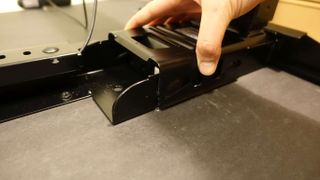
Then press and mount the clamp onto the leg.
Image 8 of 17
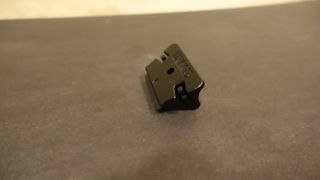
You'll then need to locate the lock.
Image 9 of 17

Insert the lock into the clamp...
Image 10 of 17
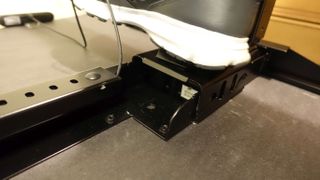
...and then use one of your feet to press down onto the lock so that it latches down into the clamp (it helps to wear shoes!)
Image 11 of 17

Plug in the Ethernet cables (this sends data to the motors to raise and lower the desk).
Image 12 of 17
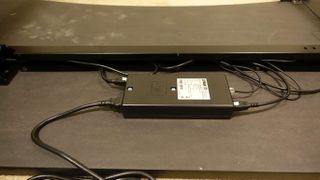
Make sure the power and Ethernet cables are hooked into the central hub.
Image 13 of 17

Screw on the front panel controller.
Image 14 of 17

Then screw in the feet.
Image 15 of 17
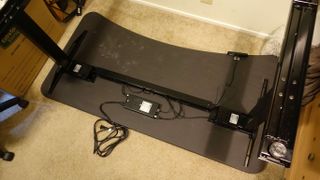
This is what it should look like once you've done all the aforementioned steps.
Image 16 of 17
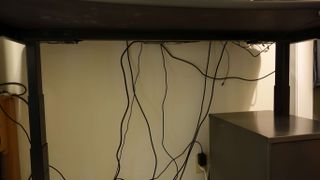
As you can see, there's not a lot in the way of cable management.
Image 17 of 17
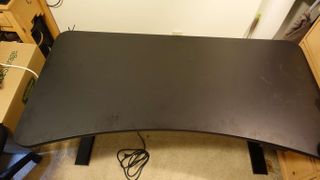
One downside to the desk is that it is kind of a fingerprint magnet.
The Verdict
UpDesk PowerUp Series III
An uplifting desk
ABOUT THE AUTHOR Jimmy Thang has been Maximum PC's Online Managing Editor since 2012, and has been covering PC hardware and games for nearly a decade. His particular interests currently include VR and SFF computers.
We recommend By Zergnet
Post a Comment